

Remove Tartar at Home: Tools and Tips That Deliver Results
The right tools, the sequence that works, and the frequency that turns good intentions into visible results.
The gap between knowing you need to do something about tartar and actually doing it effectively at home comes down to having the right tools and knowing how to use them. Here is the practical guide: what to buy, what to skip, and how to structure the routine for compounding results.
The Non-Negotiable Foundation: Your Brush
Before any specialized tool, brushing sets the baseline. Fresh plaque that is not removed by brushing mineralizes within days, constantly adding new raw material for calculus formation. No removal tool, however good, keeps up with calculus formation driven by consistently inadequate plaque removal. The foundation has to be solid before the specialized tools can do their work.
A soft-bristled brush (manual or electric) used twice daily at the correct 45-degree angle to the gum margin, for a full 2 minutes, is the clinical standard. In practice, 90 seconds is what most people manage. If you use an electric toothbrush, the rotating-oscillating heads cover technique deficiencies better than manual brushing and are worth the upgrade.
One technique fix that makes a measurable difference: dedicate 15 seconds specifically to the inner surfaces of lower front teeth and the gum-margin area of lower back teeth. These are the highest-calculus-accumulation zones and receive the least attention from most people's brushing patterns.
Tools work best in sequence. Floss first to loosen interproximal plaque. Brush to sweep away dislodged debris. Use the ultrasonic device for calculus disruption on known buildup areas. Rinse thoroughly. Running this sequence takes under 6 minutes and covers every zone a solo method misses.
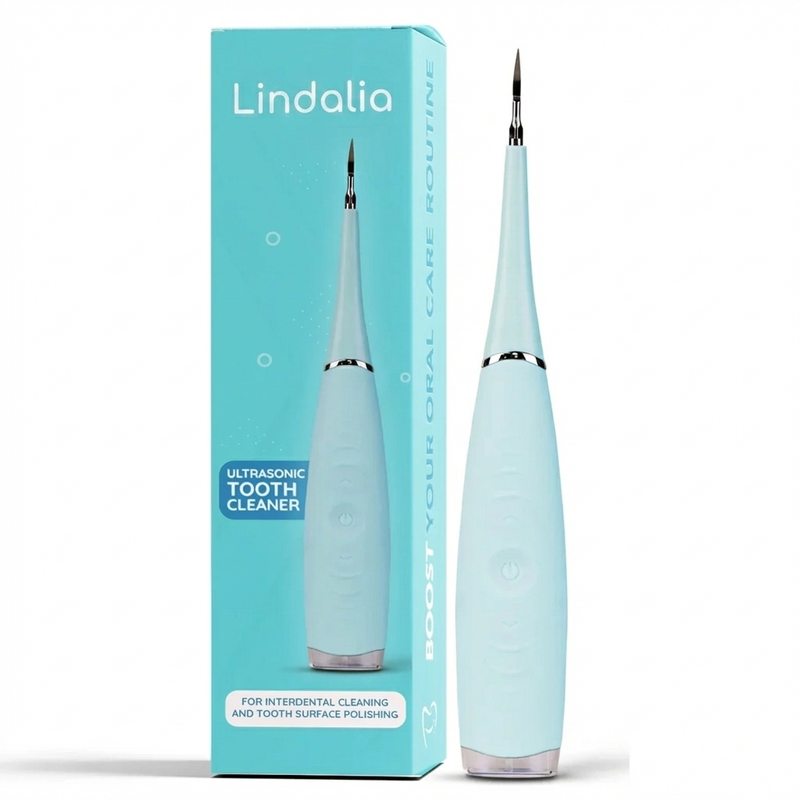
Ultrasonic Tooth Cleaner by Lindalia
The tool that addresses what brushing and flossing cannot reach: mineralized tartar deposits. Fine metal tip, LED visibility, USB rechargeable.
See the ProductThe Removal Tool: Ultrasonic Device
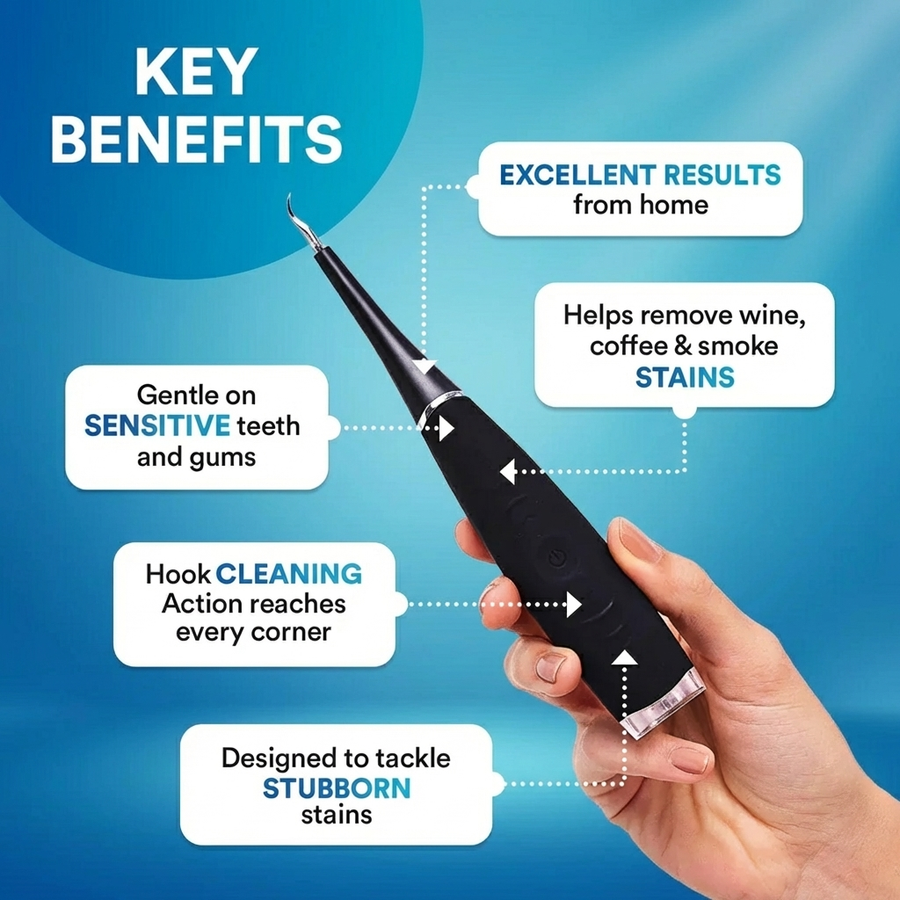
An ultrasonic tooth cleaner is the only consumer device category that targets the mechanism by which tartar adheres to teeth. The vibrating metal tip transmits energy into the crystalline deposit, fracturing it at its bond with the enamel surface. No scraping, no acid, no abrasion.
For optimal results, focus the device on the highest-priority zones: inner lower front teeth (highest accumulation area due to sublingual salivary gland proximity), back lower molars near the parotid gland opening, and the gum margins of all teeth where calculus typically begins its formation. Two to three focused minutes on these zones twice weekly produces more improvement than casual, unfocused sessions of greater duration.
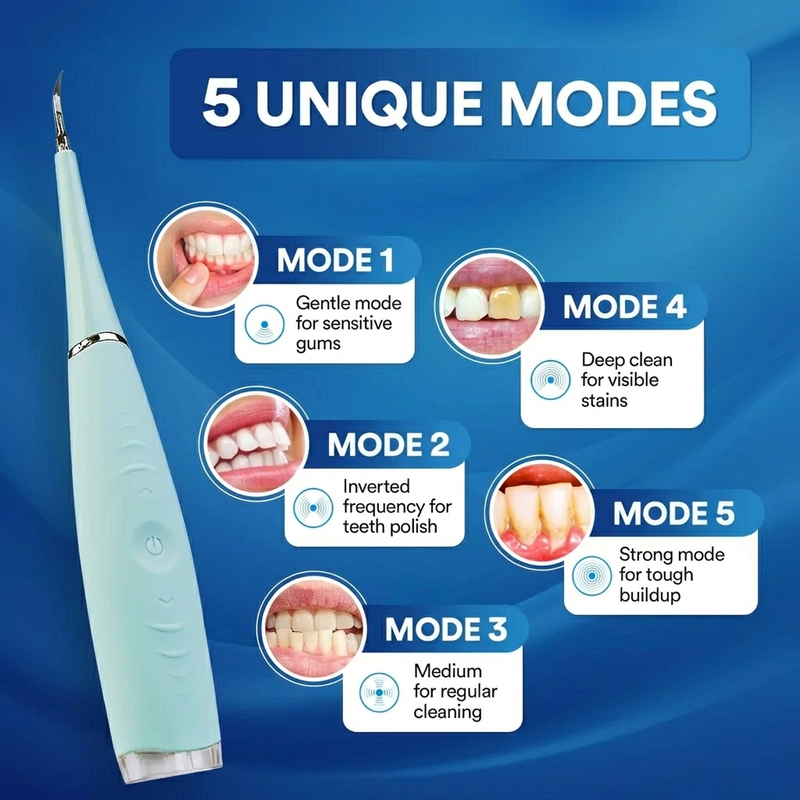
Zone by zone progression within each session: inner lower front teeth (30 to 40 seconds), outer lower back teeth (30 seconds each side), upper gum margins (30 seconds per quadrant). Start at low intensity for the first few sessions. Move to middle intensity after 2 to 3 weeks when the sensation is familiar and comfortable.
The Polish Step: Flat Tip or Polishing Paste
After the fine tip disrupts calculus deposits, the surfaces left behind are microscopically rough compared to an intact enamel surface. Calculus leaves a slightly pitted footprint when it detaches, and this roughness makes the surface more prone to new plaque and stain adherence.
The flat polishing tip, included with quality ultrasonic devices, smooths these surfaces when used with a small amount of toothpaste or prophy paste as a polishing medium. The polishing step is best done at the end of a session, after the fine tip has addressed deposits. Time investment: 60 to 90 additional seconds covers the full mouth.
This finishing step is optional but genuinely useful. Surfaces polished regularly after calculus removal stay cleaner longer and resist staining better. Coffee and tea drinkers notice a meaningful difference in how quickly surface staining returns after sessions that include the polishing step versus sessions that do not.
A water flosser used after the ultrasonic device flushes debris dislodged during the session out of interproximal spaces and the gum margin zone. The combination of ultrasonic disruption followed by hydraulic flushing produces cleaner interproximal surfaces than either tool achieves independently. The flosser is not required but significantly improves the result in tight contact areas.
Anti-Tartar Toothpaste: Prevention Between Sessions
Pyrophosphate-containing tartar-control toothpastes slow new calculus formation between your ultrasonic sessions by inhibiting the mineralization pathway in plaque. They do not remove existing tartar, but they raise the bar for how quickly new deposits form.
Used consistently in your daily brushing routine, they reduce the rate of new calculus formation by 35 to 55% compared to regular toothpaste. Combined with twice-weekly ultrasonic maintenance, this means the calculus you remove stays removed longer, and the cumulative reduction in buildup is greater than with either approach alone.
Choose a tartar-control toothpaste with a low-to-moderate RDA (relative dentin abrasivity) rating, ideally under 150, to avoid excessive abrasion during twice-daily brushing.
The routine that compounds: remove deposits with ultrasonic, slow new formation with anti-tartar toothpaste, flush debris with a water flosser.
Lindalia Ultrasonic Tooth Cleaner
The anchor of a results-driven at-home routine. Fine tip, flat tip, LED, multiple modes, USB rechargeable.
See the ProductFrequency That Delivers
The most common error in at-home tartar management is under-frequency. People who use the ultrasonic device once every 10 to 14 days see minimal cumulative improvement because new calculus forms and re-establishes before the next session. The effective frequency is 2 to 3 sessions per week, consistent across weeks and months, not intensive bursts followed by gaps.
Think of it like maintaining a clean car. A weekly wash keeps it consistently presentable. Monthly washes mean it is either sparkling clean or visibly dirty depending on where you are in the cycle, but the average condition over time is worse than the weekly approach.
The optimal progression: start at 2 sessions per week for the first month to establish the habit and allow your technique to develop. By month 2, you will notice visibly smoother tooth surfaces and your hygienist will notice less buildup. From there, 2 to 3 sessions per week indefinitely is the maintenance standard that keeps results compounding.
Lindalia Ultrasonic Tooth Cleaner
200+ uses per charge means the device is always ready. Fine tip for removal. Flat tip for polishing. LED for precision. The tool built for consistent use.
See the Product